SharePoint List Item Attachments

You may already be aware that is it not good practise to add attachments to SharePoint list items, as there is very limited document management functionality for SharePoint list item attachments. Take a look at the version history of a list item with an attachment and you will see that it does not record when the attachment was applied to the list! This short blog will show you how to associate documents with a list item without using the list item attachment functionality.

Instead of storing the attachments in the list item you should store them within a dedicated document library to avail of the library’s rich document management functionality. Within the document library’s setting page create a new column of the type “Lookup” that links back to the SharePoint list – see screenshot below.

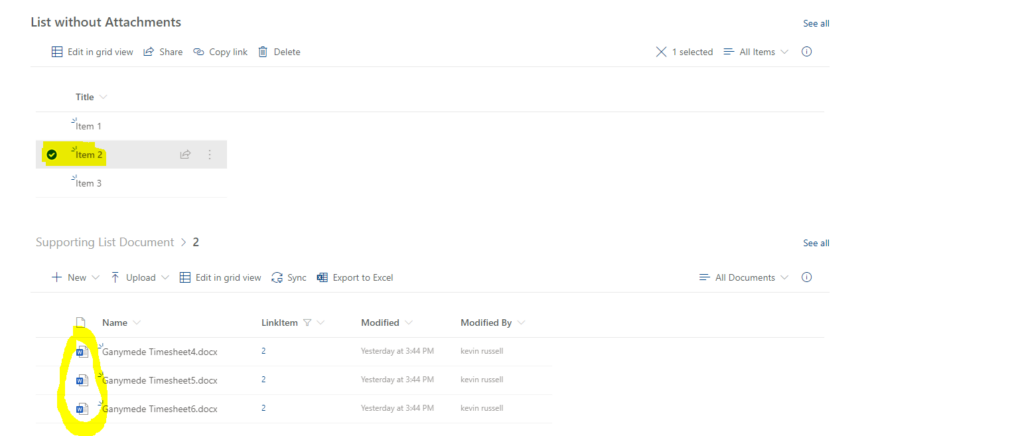
Finally you need to create a new Page on the SharePoint site. This page will allow you to view the list item and it’s associated documents in the one place. On the page add a List Web Part and below it add a Document Library web part – see screenshot below.

Configure the List Web Part’s properties so it refers to the list without attachments, and configure to Document library Web Part’s properties so it refers to the library dedicated to contain the list’s attachments. Also within the Document library Web Part properties panel turn on “Dynamic Filtering”, specify the lookup field you created for the “Column in the Supporting List Document to filter” field, specify the SharePoint list in the “List or library containing the filter value” field, and specify the ID value for the “Column containing the filter value.

You can now test your new list item attachment functionality once you apply these setting and publish your page. Simply select an item from SharePoint list web part and it will automatically reveal its associated documents.
Creating your first Power Automate app

This post discusses how you can create a Power Automate app to produce an alternative email to SharePoint’s “Alert Me” email.

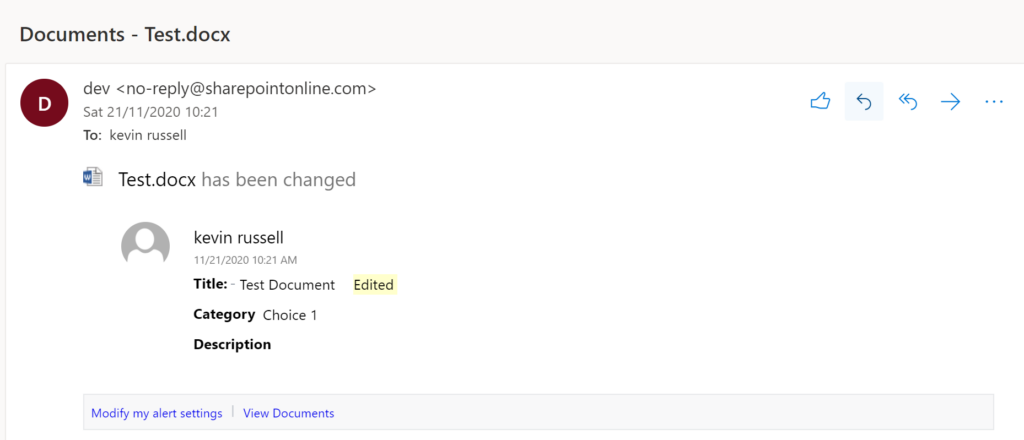
SharePoint’s “Alert Me” email content has a standard format containing the custom fields of the SharePoint document or list item – see screenshot below. What can you do if this format is unsuitable?

This is a situation where you can use Microsoft’s Power Automate App. Power Automate is an App that enables integration between software applications, and in this case it allows us to produce a custom integration between a SharePoint list/document library app and Microsoft’s emailing app, Outlook.

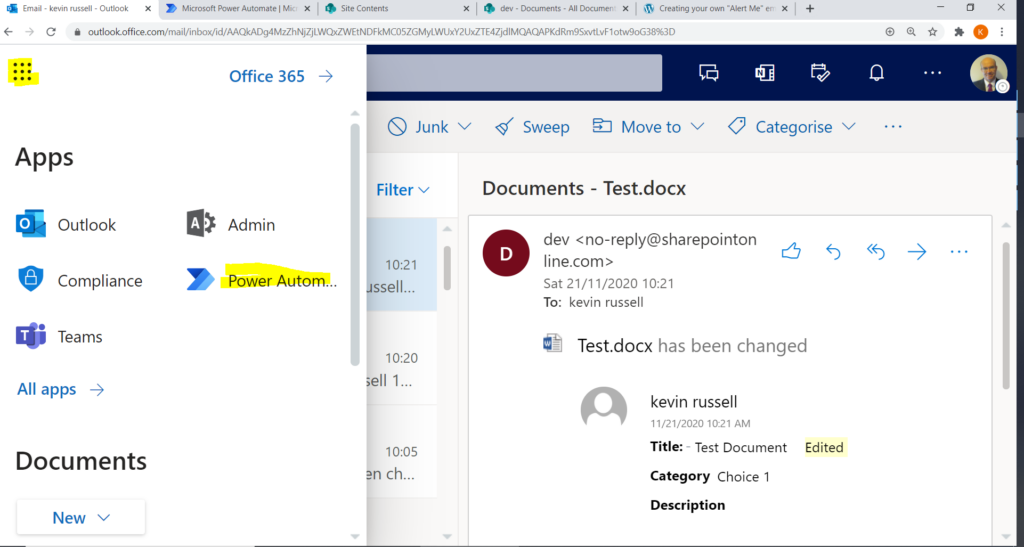
The good news is Microsoft provide a free version of their Power Automate app with O365 and this version is packed with functionality. You can access your Power Automate App from the O365 App Launcher located at the top left of your browser – see screenshot below.

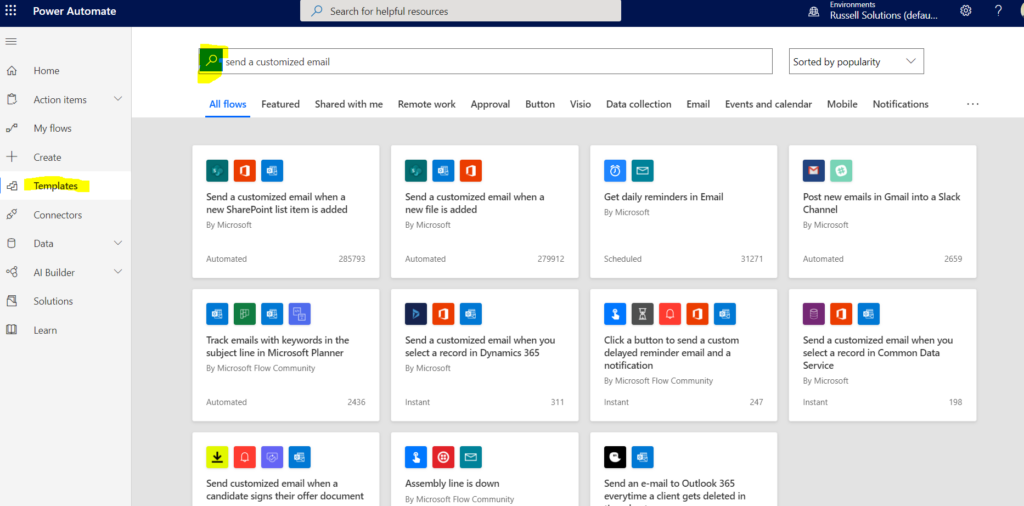
The first time you access Power Automate can be a daunting one, as you can become overwhelmed by its vast range of options. However, you do not need to understand all its functionality to perform the task in hand. Select the Template link for the menu on the left and type in “send a customized email” in the Search Box and click on its Search Button (i.e. the magnifying glass) to reveal a suitable template for our needs.

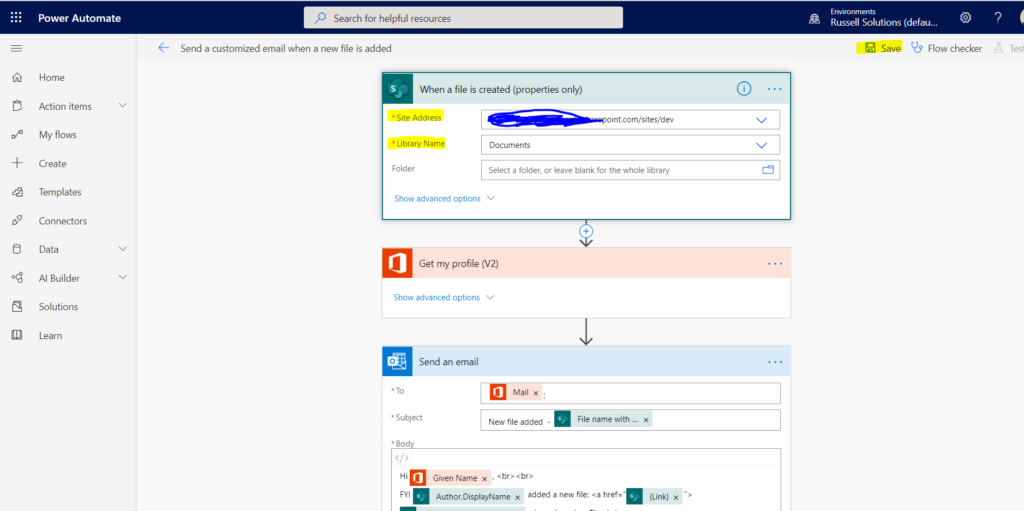
If you want a customised email when a file is added to a document library select the “Send a customized email when a new file is added” template. Once the template is opened provide the url for your “Site Address” and “Library Name” and Save your design.

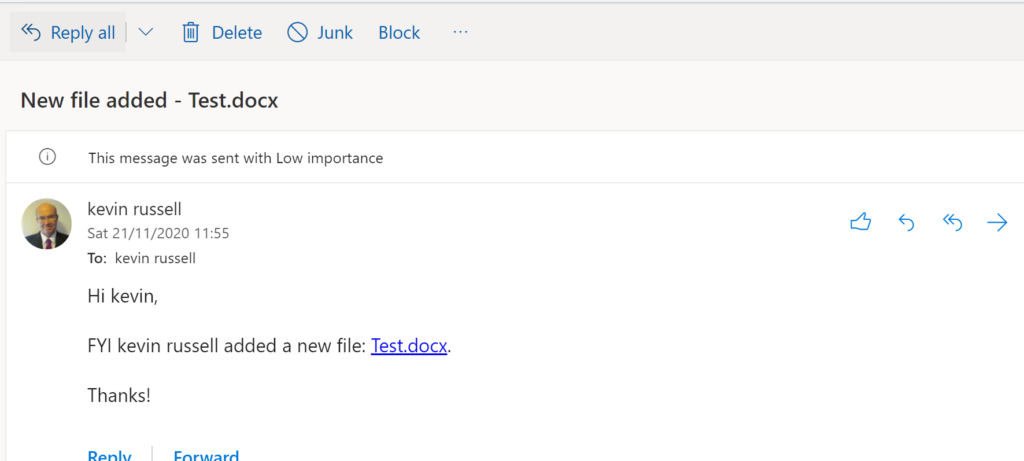
Upload a document to the document library and you should receive an email notification like the one shown in the screenshot below. However, now you have the opportunity to style this notification in the manner you require by modify the email body in the “Send an email” action of your Power Automate designed App.

This customised email notification is sent whenever a document is uploaded. If you wish to only be notified when certain documents are uploaded you need to customised the Power Automate template. This is the topic of my next Blog.

Filtering SharePoint “Alert Me” notifications

I thought this hidden SharePoint gem would be a good topic for my first venture into the world of blogging. Filtering SharePoint “Alert Me” notifications is simple to implement as it requires no coding skills and uses standard SharePoint Out Of the Box (OOTB) functionality.

When you first attempt to set up an alert on a SharePoint list or document library you are presented with the straight forward configuration dialog as shown below. This dialog allows to you configure your email alert for all the documents in the list or document library. But what if you wish to be alerted for only a sub-set of the document items?

Default Alert Me Configuration Screen

The default view on a list or document library brings back all the items. When you create own views you can filter this list to a sub-set of items. Once you have created you first custom view the “Alert Me” configuration dialog recognises this and presents the view thereby allowing you to be alerted on a sub-set of items – see screenshot below.

Alert Me Configuration Screen on a Custom View is present

The email content has a standard format containing the custom fields of the item. What can you do if this format is unsuitable? This is covered in my next blog Creating your first Power Automate app