This post demonstrates how you can introduce scheduling in Power Automate apps
The Out Of the Box (OOTB) SharePoint “Alert Me” functionality contains an option to specify when you wish to receive your email notifications (see screenshot below). This Blog post will outline how you can schedule your email notifications if you decided to customise your email notification body using Power Automate

Power Automate apps are triggered by some event and once triggered they perform their prescribed actions. In the Blog post Creating your own “Alert Me” email, the Power Automate trigger was “When a file is created (properties only)”. This trigger results in the app’s actions (i.e. emails being sent) being immediately executed upon a documented being uploaded to the specified document library. To schedule the email notifications we must replace this trigger with Power Automate’s scheduling trigger
It is not possible to directly replace a Power Automate trigger. This is because the actions prescribed after the trigger are too dependent on the trigger itself. This means we need to create a new Power Automate app to schedule our “Alert Me” notifications.
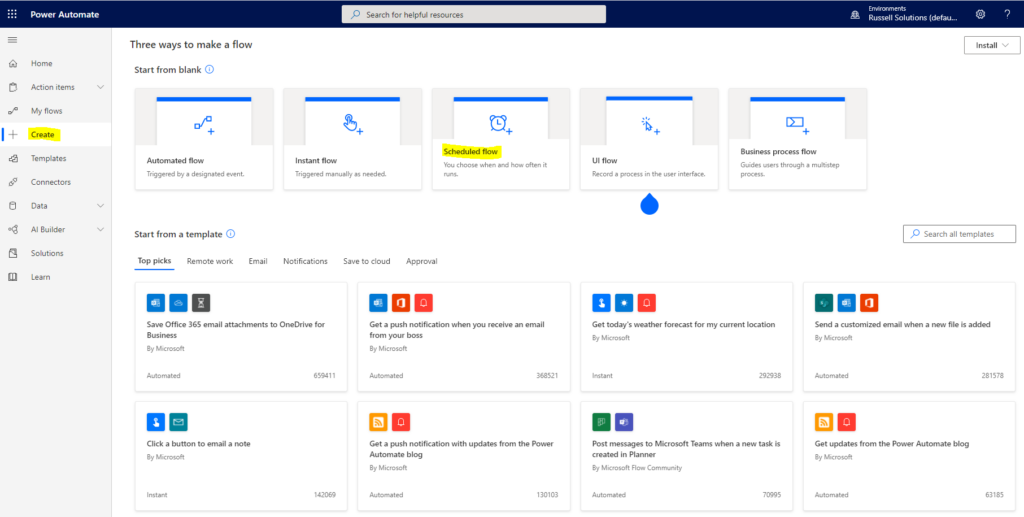
Within Power Automate, select the “Create” menu option and then the “Schedule Flow” blank template option. Then name your app and specify how often you wish the app to be triggered – you have intervals of seconds, minutes, hours, days, weeks and months!

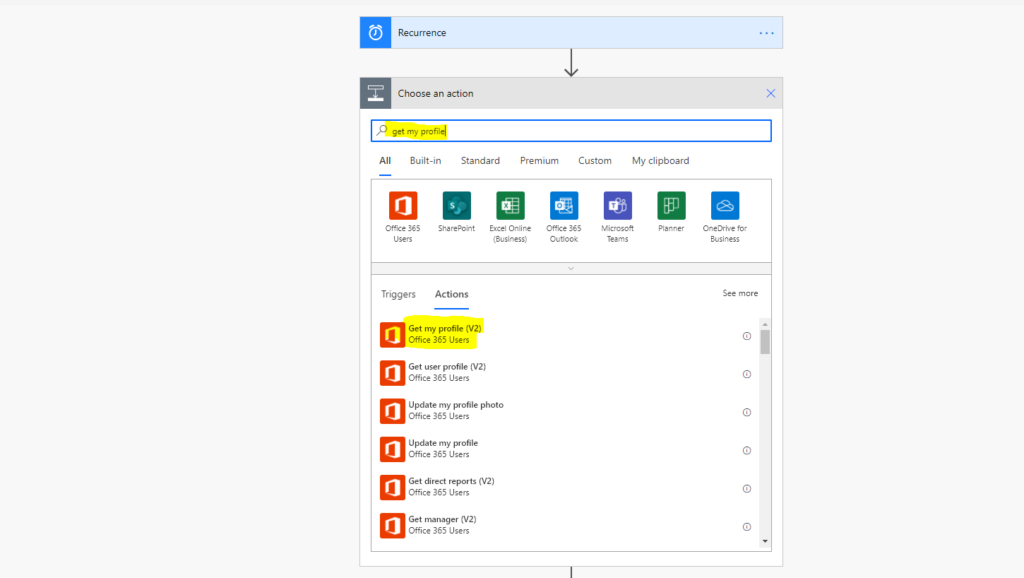
Then for the app’s next step (i.e. action) select the “Get my profile (V2)” component. We will need the data from this component later when we are composing our notification email.

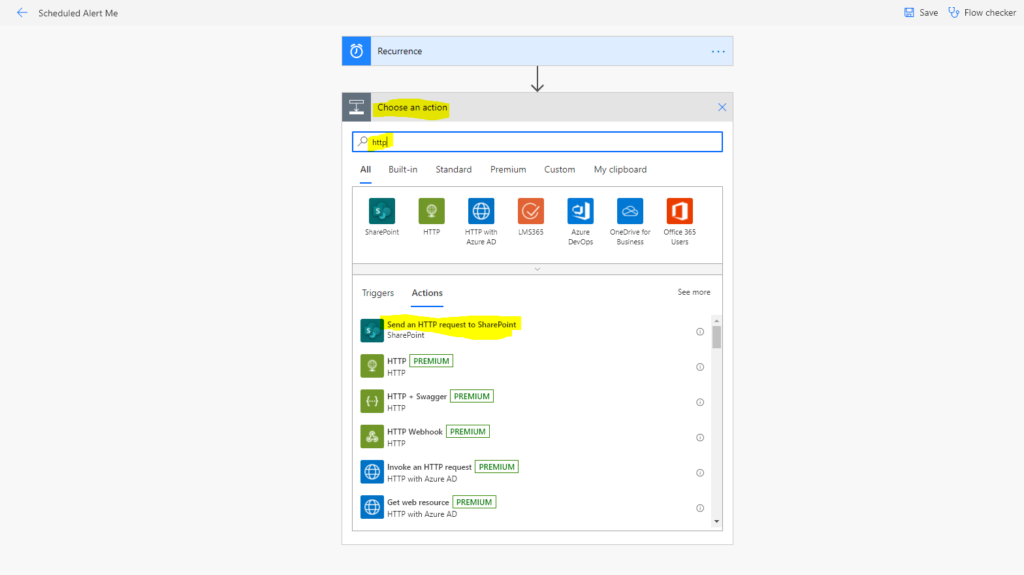
Then for the app’s next step select the “Send an HTTP request to SharePoint” component.

Within the component’s “Site Address” field specify the site address that contains your document library, and within the compnent’s “Uri” field add the text “_api/web/lists/getbytitle(‘Documents’)/items” (i.e. replacing the library title of “Documents” with the name of your custom Document Library). This uri performs what is called a REST query on the SharePoint Document Library to return information on all the items in the Document Library.
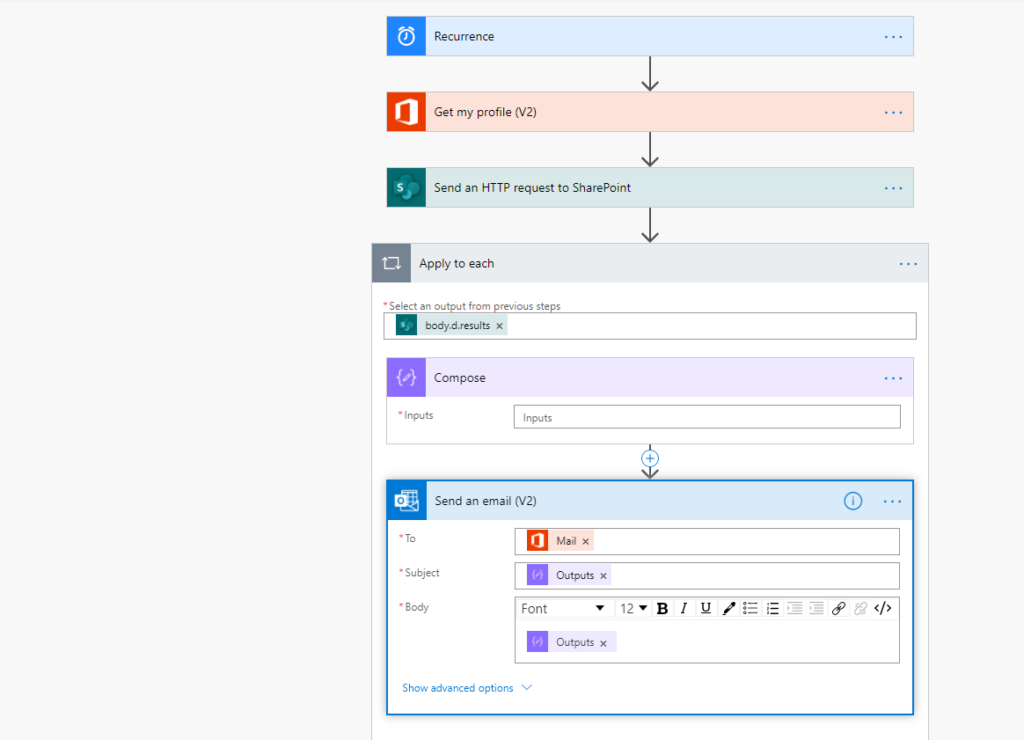
Then for the app’s next step select the “Apply to each” component. This component will allow us to loop through, one at a time, each of the Document Library items returned from the REST query.

Within this component’s “Select an output from previous steps” field add the expression : outputs(‘Send_an_HTTP_request_to_SharePoint’)?[‘body’]?[‘d’]?[‘results’] This expression obtains just the Document Library item information from the REST query.
Now within the “Apply to each” component block add a Compose Data Operation action. We are going to configure this action to extract the Document “Title” for the current item. (note : You may wish to add several Compose action to extract additional item information you wish to include in your email notification).

Within the Compose Inputs field add the expression : items(‘Apply_to_each’)?[‘Title’]

Finally, add a “Send an email (V2)” action below the Compose action and configure it to use the Compose Title value. Your app should now look as shown below and will run at intervals as you have scheduled emailing you Title information on all the Documents within your Document Library.

This post demonstrated scheduling in Power Automate apps by using the Scheduling trigger to fire when our workflow email notification app starts. Over time the number of emails from the Power Automate app will increase as additional documents are added to the Document Library. You are probably only interested in the latest documents that have been uploaded. To achieve this you need to add a filter on the REST query of your Power Automate app and this is the topic of my next Blog post.
