This post demonstrates how you can filter content in Power Automate.
The Power Automate “Alert Me” app created in my previous Blog notifies you whenever any document is uploaded to your SharePoint Document Library. What if you wish to be notified of only certain files being uploaded? You could use the approach outlined in my first Blog. Alternatively, you can edit the Power Automate “Alert Me” app.
Editing a Power Automate app is easy as it amounts to configuring added components ( i.e. no coding skills are required).
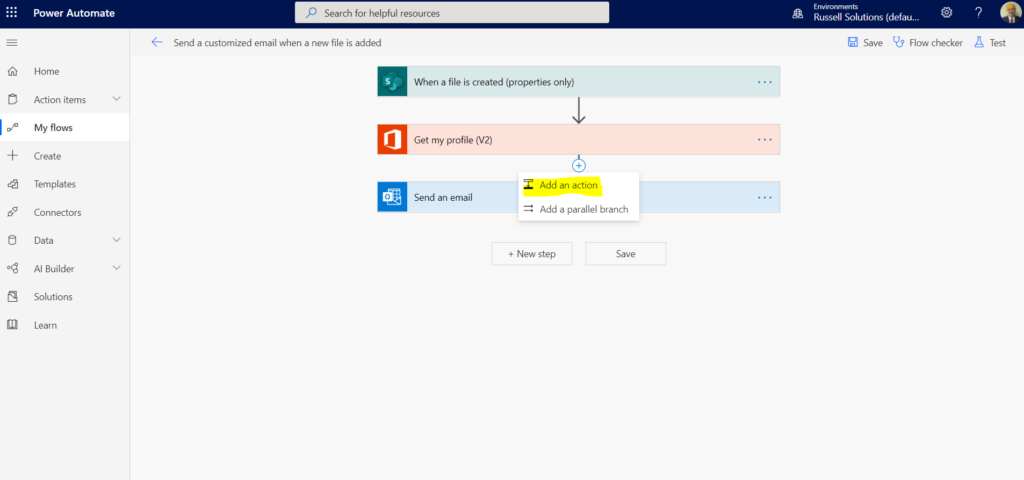
To filter content in Power Automate we can use Power Automate’s Condition component. Within the app’s edit canvas hover over the line between the “Get my Profile” and “Send an email” blocks. This will reveal an option dialog and from it select the “Add an action” option.
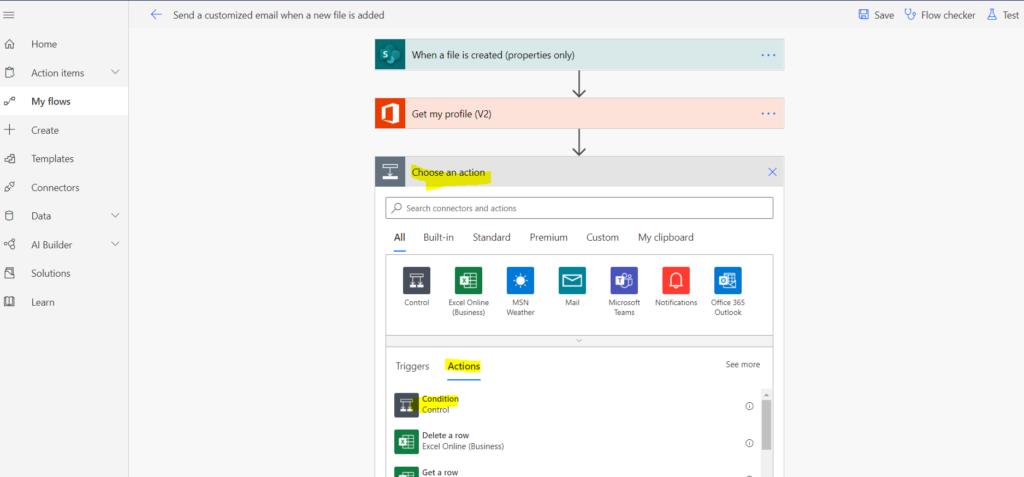
Then from the “Choose an action” block select the Condition Action.
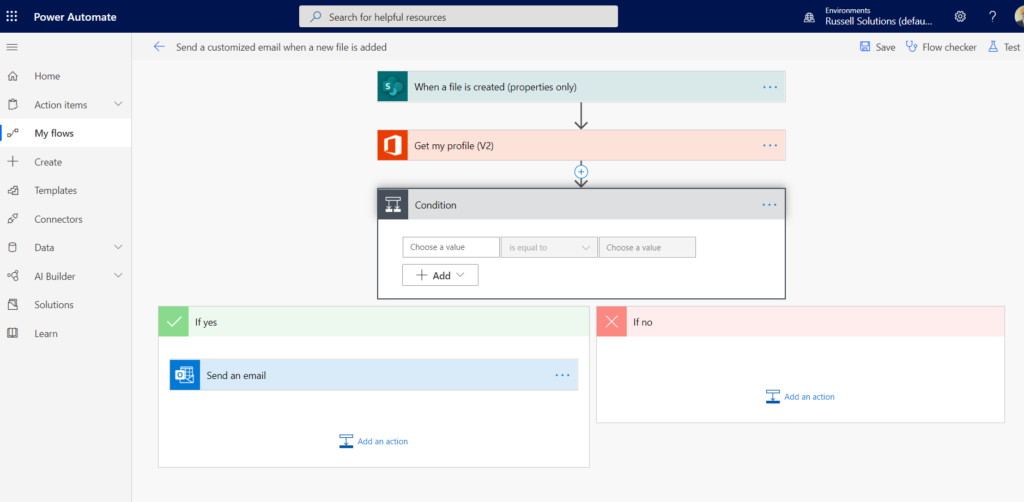
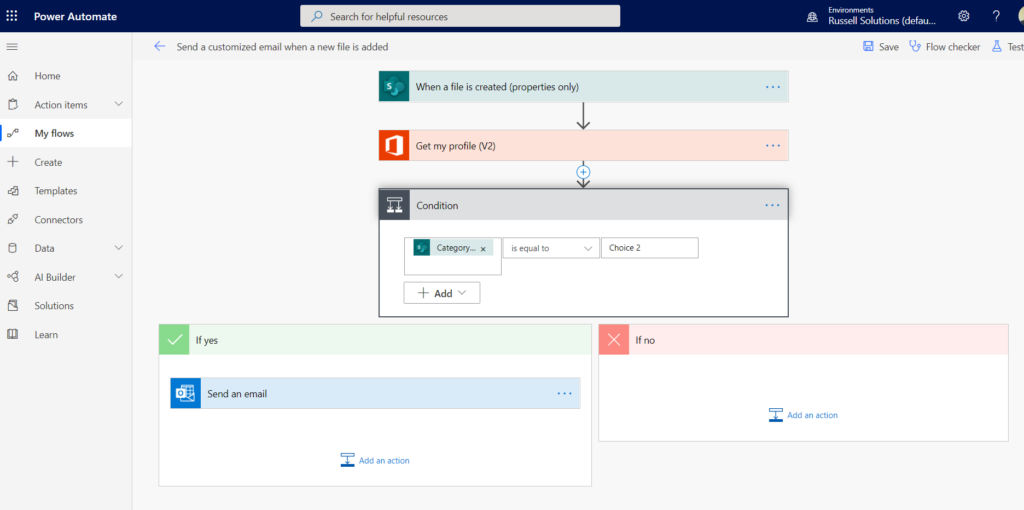
You should now see an Condition block and a block if the Condition block’s criteria is met (i.e. the If yes block) and a block if the Condition block’s criteria is not met (i.e. the If no block). Now drag the “Send an email” into the If yes block.
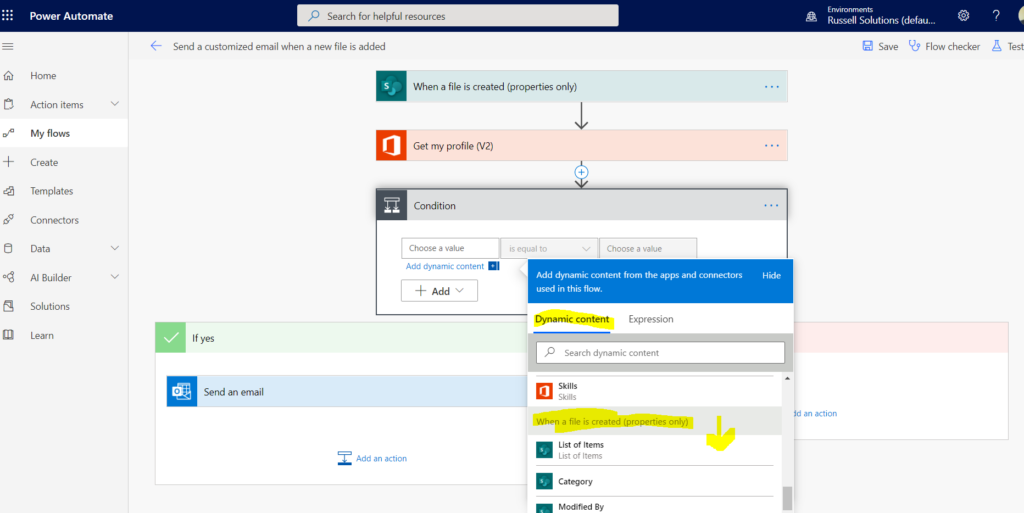
All that now remains is to specify the Condition block’s filter criteria. Place your cursor within the Condition block’s “Choose a value” textbox reveals a selection dialog. This dialog allows us to select the filtering field criteria for the document library. These are the fields in the “When a file is created (properties only)” category of the “Dynamic Content” group.
Once you have specified your filtering criteria make sure you save you design and you should have filtered customised email alerts on your document library.
My next Blog post will outline how you can schedule these Power Automate email notifications.
